Buildings
From complete scenes to individual, architecturally accurate structures and complete cities in a box, modelers can choose from a comprehensive selection of N, HO and O scale structures. Read an excerpt on Buildings from The Complete Guide to Model Scenery to learn more.
-
![Built-&-Ready<sup class='tm'>®</sup>]()
Frequently Asked Questions
-
How do I prevent the walls of my buildings from glowing and light leaking from seams?
Use the Just Plug Light Block Kit. Apply Masking Paint to interior walls to keep the building from glowing. Press the included Ribbon Putty into interior corners, joints, and along the bottom edges of structures to seal the seams.
Click here to see a video on using the Light Block Kit to prevent glow.
-
What material are the building structures made of?
Our Buildings and Building Kits are mainly injection-molded styrene. Some of the building details are molded slick plastic.
-
How do I reattach details to a Built-&-Ready?
We recommend cyanoacrylate adhesive (CA glue/super glue) for reattaching details. Before gluing, sand off excess glue from glue points with fine-grade sandpaper. Remember, with CA glue less is more. If too much glue is applied, the piece will not set and dry. Use a straight pin to apply a tiny amount of glue to both contact surfaces. Reattach detail and hold until setting begins (approximately 30 seconds).
-
What are the ratios of the different scales?
Model Scales
G = 1:24
O = 1:48
S = 1:64
OO = 1:76.2
HO = 1:87
N = 1:160
Z = 1:220
-
How do I prevent the walls of my buildings from glowing and light leaking from seams?
-
![Building Kits]()
Building Kits
Frequently Asked Questions
-
I purchased a few DPM building kits and there are no roofs. Why is this and what do I use?
If an actual roof is not included in your building kit, the kit will include a styrene sheet to make your roof. This is our preferred material for making a roof.
-
Why is the glue not working to adhere the building walls?
Prior to adhering building pieces together, always wash pieces with warm soapy water to remove any residue. If they still do not adhere, try using a more aggressive plastic cement. Test plastic cement on the back of a building piece. Put a few drops of plastic cement, wait 5-10 seconds, touch with finger, if not sticky and gooey there may be a problem with the cement.
-
How do I prevent the walls of my buildings from glowing and light leaking from seams?
Use the Just Plug Light Block Kit. Apply Masking Paint to interior walls to keep the building from glowing. Press the included Ribbon Putty into interior corners, joints, and along the bottom edges of structures to seal the seams.
Click here to see a video on using the Light Block Kit to prevent glow.
-
How do I remove acrylic or enamel paint from my DPM building?
Poly S™ Easy-Lift-Off will remove paint without harming plastic. It is kind of a slow process but it works.
*Poly S is a Testor Corporation trademark
-
What color and types of paints were used on the following DPM structures? Corner Turret Building, Erik's Emporium and Reed's Books.
All paints used are Floquil®*.
Corner Turret Building
Brick - mix the following and apply with an airbrush:
- SP Daylight Orange
- ATSF Mineral Brown
Molding - (brush on) CN Gray
Roof of turret - Stainless Steel poly
Apply morter wash mixture over brick area as follows:
1 part - concrete, polly
9 parts - alcohol
7 parts - water
2 drops - dish soap
Reed Books
Brick - Depot Buff...apply with an airbrush
Molding - (brush on) CN Gray
Apply morter wash mixture (see above)
Eriks Emporium
Brick - use morter wash
Molding - Depot Buff
Over windows and below - Concrete
All three buildings have following also:
Roofs - Grimmy Black
Aging - use black and brown oil chalks*Floquil is a Testors Corporation registered trademark.
-
What paint colors are used on the Pre-Fab Structure "Fire Station No 3".
Here are the paint colors and techniques used to paint the fire station pictured on the Fire Station No 3 box.
Base Color – Floquil*® Foundation (#110084)
Weathering - On top of the base color, a weathering wash was applied. Mix 1-part acrylic paint in a “concrete” color, 12-parts rubbing alcohol, 8-parts water and 1 drop liquid dish soap and apply with a paintbrush. Sponge off excess.
Bricks - Paint random bricks with Antique White (#110085) and Rail Brown (#110007)Doors and Roof - Tuscan Red (#110184)Floquil is a Testors® registered trademark -
I purchased a DPM O scale building kit and one of the walls is warped. Is there any way to flatten it?
The walls and details in the DPM O Scale Building Kits Birdie's Tavern, Kirsten's Corner Cafe, and Aunt Eleanor's House are hand-cast in high quality casting resin and can become warped due to storage conditions. It is possible to flatten the walls, but it will take a little time.Lay wall flat on a cookie sheet, detailed side facing up. Place in a cold oven and heat to 250º F. When temperature has been reached, turn oven off and allow piece to cool to room temperature inside oven (approximately 12 hours). Do not open the oven door while cooling, as this could cause further warping.
-
No decals were included with the DPM building kit I purchased. I can't find them on your site, what do I use?
Decals are not included with the basic DPM Building Kits. We do offer a complete line of Dry Transfer Decals and Model Graphics that include a wide array of letters, numbers and signage to meet your needs.
-
The back wall of some DPM kits is too wide, what should I do to correct this?
The back walls appear wider due to draft angles. Draft angles are necessary for removing the walls from the mold. Following the kit instructions, sand beveled edges (draft angles) on walls until flat and fit squarely together.
-
What paint colors were used to paint Sicken Tire Company model that is on the front of the box?
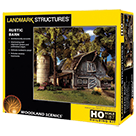
Below are the paint colors used to paint the Landmark Structure Building Kit - Sicken Tire Company. Additional painting and weathering tips can be found on the back of the instructions booklet.Building Base Color: Floquil® - Depot BuffRandom Bricks: Polly Scale™ - Earth BrownTrim above Windows: Polly Scale - Vermont GreenApply a Weathering Wash on top of dried base color. Using a paintbrush, dab on small amounts of wash (formula follows) until desired look is achieved. Sponge off excess.
Formula: Mix 1-part acrylic paint (color suggestion: concrete or aged concrete), 12-parts rubbing alcohol, 8-parts water and 1 drop liquid dish soap. -
What material are the building structures made of?
Our Buildings and Building Kits are mainly injection-molded styrene. Some of the building details are molded slick plastic.
-
What paint colors were used to paint Rocky's Tavern.
The Scenic Details kit Rocky's Tavern was painted with the following paint colors.Brick Walls (base color) - Floquil® “Brick”
Random Bricks – Polly Scale™ “Antique White” and “Rail Brown”
Stone along bottom of walls – Polly Scale “CN Gray” and “Aged Concrete”Weather the structure with a Weathering Wash. Mix 1-part acrylic paint (Concrete or Aged Concrete), 12-parts rubbing alcohol, 8-parts water and 1 drop liquid dish soap. Using a paintbrush, dab on small amounts of wash until desired look is achieved. Sponge off excess. -
Do you have any painting and weathering tips for your building kits?
Yes, we do!Colors are your choice, but we recommend natural brick colors such as rust, tan or other earth tones. Paint door and window trim the same color as the brick or a contrasting color.Painting
Airbrush or Hand-brush: Flat finish paint
Aerosol: Flat finish spray paintInterior LightingBuildings may not be light-ready, but some modelers are adept at adding lighting. If lighting a building, reduce interior glare by painting interior walls and underside of roof flat earth-tone color.Weathering
Weathering Wash: Using a paintbrush, dab on small amounts of wash (formula follows) until desired look is achieved. Sponge off excess.
Formula: Mix 1-part acrylic paint (color suggestion: concrete or aged concrete), 12-parts rubbing alcohol, 8-parts water and 1 drop liquid dish soap.
Airbrush: Lightly spray thinned flat black paint (color suggestion: grimy black) to areas where natural discoloration can occur (near windows, chimneys, etc.).
Chalk: Rub a dark color of pastel chalk (color suggestion: gray, black, brown, etc.) on sandpaper to create a chalk dust. Using a paintbrush, dab chalk dust where discoloration can occur. -
What colors were used to paint Sonny's Super Service Building Kit pictured on the box?
Below are the paint colors used to paint the Landmark Structure Building Kit - Sonny's Super Service . Additional painting and weathering tips can be found on the back of the instructions booklet.Building Base Color: Floquil® - Wisconsin Central GoldRoof: Floquil - Daylight RedRandom Bricks: Polly Scale™ - Earth Brown
Trim: Polly Scale - TTX YellowApply a Weathering Wash on top of dried base color and roof. Using a paintbrush, dab on small amounts of wash (formula follows) until desired look is achieved. Sponge off excess.
Formula: Mix 1-part acrylic paint (color suggestion: concrete or aged concrete), 12-parts rubbing alcohol, 8-parts water and 1 drop liquid dish soap. -
What are the ratios of the different scales?
Model Scales
G = 1:24
O = 1:48
S = 1:64
OO = 1:76.2
HO = 1:87
N = 1:160
Z = 1:220
-
Can I "scribe" and "snap" the DPM wall material?
Yes, you can.
-
I purchased a few DPM building kits and there are no roofs. Why is this and what do I use?
-
![Modular Structures]()
Modular Structures
Frequently Asked Questions
-
Why is the glue not working to adhere the building walls?
Prior to adhering building pieces together, always wash pieces with warm soapy water to remove any residue. If they still do not adhere, try using a more aggressive plastic cement. Test plastic cement on the back of a building piece. Put a few drops of plastic cement, wait 5-10 seconds, touch with finger, if not sticky and gooey there may be a problem with the cement.
-
How do I prevent the walls of my buildings from glowing and light leaking from seams?
Use the Just Plug Light Block Kit. Apply Masking Paint to interior walls to keep the building from glowing. Press the included Ribbon Putty into interior corners, joints, and along the bottom edges of structures to seal the seams.
Click here to see a video on using the Light Block Kit to prevent glow.
-
How do I remove acrylic or enamel paint from my DPM building?
Poly S™ Easy-Lift-Off will remove paint without harming plastic. It is kind of a slow process but it works.
*Poly S is a Testor Corporation trademark
-
What paint colors are used on the Pre-Fab Structure "Fire Station No 3".
Here are the paint colors and techniques used to paint the fire station pictured on the Fire Station No 3 box.
Base Color – Floquil*® Foundation (#110084)
Weathering - On top of the base color, a weathering wash was applied. Mix 1-part acrylic paint in a “concrete” color, 12-parts rubbing alcohol, 8-parts water and 1 drop liquid dish soap and apply with a paintbrush. Sponge off excess.
Bricks - Paint random bricks with Antique White (#110085) and Rail Brown (#110007)Doors and Roof - Tuscan Red (#110184)Floquil is a Testors® registered trademark -
What material are the building structures made of?
Our Buildings and Building Kits are mainly injection-molded styrene. Some of the building details are molded slick plastic.
-
Do you have any painting and weathering tips for your building kits?
Yes, we do!Colors are your choice, but we recommend natural brick colors such as rust, tan or other earth tones. Paint door and window trim the same color as the brick or a contrasting color.Painting
Airbrush or Hand-brush: Flat finish paint
Aerosol: Flat finish spray paintInterior LightingBuildings may not be light-ready, but some modelers are adept at adding lighting. If lighting a building, reduce interior glare by painting interior walls and underside of roof flat earth-tone color.Weathering
Weathering Wash: Using a paintbrush, dab on small amounts of wash (formula follows) until desired look is achieved. Sponge off excess.
Formula: Mix 1-part acrylic paint (color suggestion: concrete or aged concrete), 12-parts rubbing alcohol, 8-parts water and 1 drop liquid dish soap.
Airbrush: Lightly spray thinned flat black paint (color suggestion: grimy black) to areas where natural discoloration can occur (near windows, chimneys, etc.).
Chalk: Rub a dark color of pastel chalk (color suggestion: gray, black, brown, etc.) on sandpaper to create a chalk dust. Using a paintbrush, dab chalk dust where discoloration can occur. -
Do your modular system wall sections have a brick detail or are they smooth?
N, HO and O scale Modular System Wall Sections have brick detail.
-
What are the ratios of the different scales?
Model Scales
G = 1:24
O = 1:48
S = 1:64
OO = 1:76.2
HO = 1:87
N = 1:160
Z = 1:220
-
Can I "scribe" and "snap" the DPM wall material?
Yes, you can.
-
Why is the glue not working to adhere the building walls?
-
![Roomettes Kits]()
Roomettes Kits
-
![DPM/Roomettes Combos]()
DPM/Roomettes Combos
-
![Just Plug<sup>®</sup> Lighting System]()
Just Plug® Lighting System
Frequently Asked Questions
-
How do I prevent the walls of my buildings from glowing and light leaking from seams?
Use the Just Plug Light Block Kit. Apply Masking Paint to interior walls to keep the building from glowing. Press the included Ribbon Putty into interior corners, joints, and along the bottom edges of structures to seal the seams.
Click here to see a video on using the Light Block Kit to prevent glow.
-
How many Just Plug Extension Cables can I connect together without compromising the light brightness?
Up to 50 Extension Cables can be connected together without compromising light brightness.
-
What DC or AC voltage train power pack is required to power the Just Plug Light Hubs?
Just Plug Light Hubs can be powered with either DC or AC power. We recommend using 16-20VAC or 24VDC. If a lower AC or DC voltage is used, the light may be dimmer. Do not exceed 20VAC or 24VDC.
-
How many lights can the Just Plug Power Supply support?
The rated output for the Power Supply is 1000 milliamps (mA). To determine the total number of Just Plug LED Lights the Power Supply can support, add up the milliamps of each LED Light being used. The milliamps are listed on the light packages. Total number of milliamps should not exceed 1000mA per Power Supply. If 1000mA is exceeded, the Power Supply's non-replaceable thermal fuse will be overloaded.
-
Can more than one Just Plug Nano or Stick-On light plug into one port on the Light Hub?
Yes, you can use up to 4 lights with the Just Plug Port Sharing Device.
-
Can you make grade crossing lights with Just Plug LED Nano Lights?
We have created grade crossing signals with Red Flashing LED Nano Lights. Run and glue the LED wire alongside the pole and crossing bar. Drill a hole through the bar and light fixture large enough for the Nano Light to fit through and super glue it in place. Camouflage the wire by painting it the same color as the pole and crossing bar.
There are many different types of grade crossing signals. We cannot guarantee this technique will work for your particular signal. -
Can you use the Just Plug System with non-Woodland Scenics bulbs?
The Just Plug Lighting System is made to be used with Just Plug products.
-
Where do I hook up my DCC to the Just Plug System?
To connect the Just Plug Lighting System to DCC, use a Connecting Cable .Plug one end of the Connecting Cable into the CTRL Port on a Light Hub or Expansion Hub (JP5702). The other end of the Connecting Cable will be connected to a DCC relay unit (per DCC manufacturer instructions).
-
What is the voltage for each Light Hub Port?
Light Hub Ports are designed as current sources, not voltage sources. Each Light Hub Port provides up to 30 milliamps (mA) of current.
-
The Just Plug Auxilliary Switch controls which ports?
The Auxiliary Switch controls the ports that are to the right of the CTRL Port on Expansion Hubs and Light Hubs.
Click here to view a video about the Auxiliary Switch and port control.
-
What is the difference between a warm white light and a cool white light in the Just Plug Lighting System?
Warm white has a yellow undertone, commonly attributed to an incandescent bulb and cool white has a blue undertone, commonly attributed to a fluorescent bulb.
-
While using the Just Plug system, will I be able to control light brightness with my DCC relay unit?
No. You will be able to turn lights ON/Off remotely with DCC, but the dimmer controls on the Light Hubs will need to be adjusted manually.
-
How do I extend the length of my Just Plug Power Supply?
You can extend the length of your Just Plug Power Supply cable with an Extension Cable or our Extension Wire and Splicer Plugs.
-
I want to buy more of the lights included in the Lights & Hub Set. What is the item number?
The lights included with the Lights & Hub Set are Warm White LED Stick-On Lights.
-
Can you mix the different style of Street and Wall Mount lights up with one linker plug?
Yes, you can mix different styles of Street and Wall Mount Lights on one Linker Plug, just be sure not to exceed the number of lights in any one package.
-
Which Just Plug Lighting System Lights are the same color as your old lighting kits?
In the White Light Kit, the white lights are similar in color to the Just Plug LED - Cool White.
In the White/Amber Light Kit, the white lights are similar in color to Cool White and the amber lights are similar in color to Yellow. -
How many Street or Wall Mount Lights can be included in one linker plug?
The product was designed so that the number of lights in each package can be connected to the included Linker Plug.
-
What size are the Nano Light bulbs?
Just Plug Nano LED Lights measure 0.5 mm x 1 mm.
-
How do I prevent the walls of my buildings from glowing and light leaking from seams?
