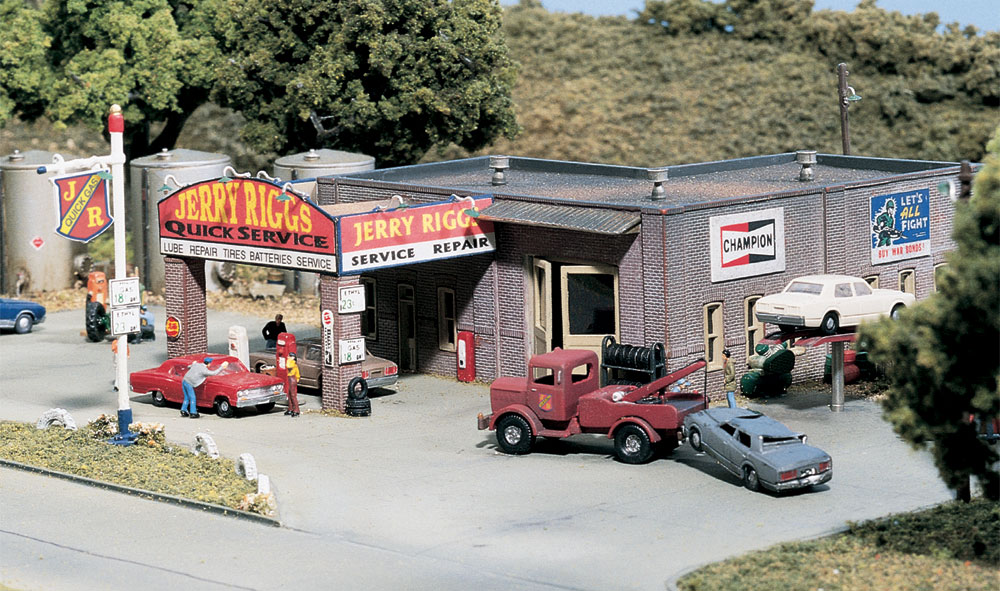
Jerry Riggs Quick Service - N Scale Kit

Notify me when "Jerry Riggs Quick Service - N Scale Kit" is available
Submit your email below and we will contact you when the item is available.
-
Description
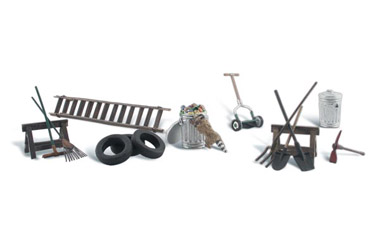
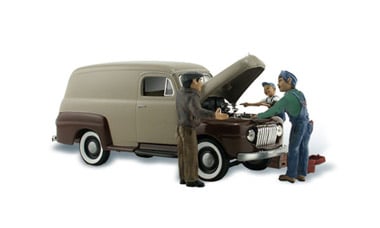
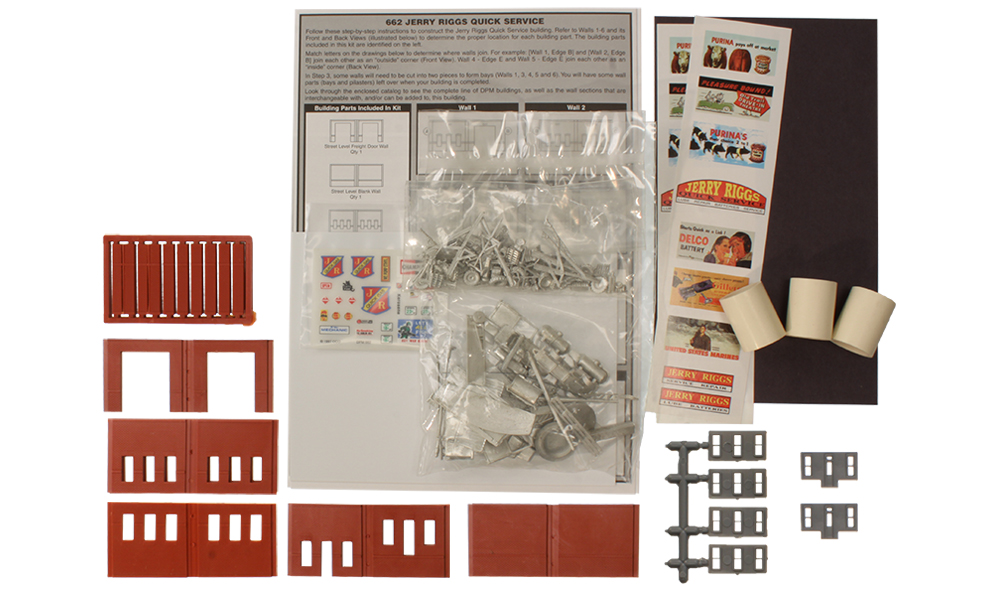
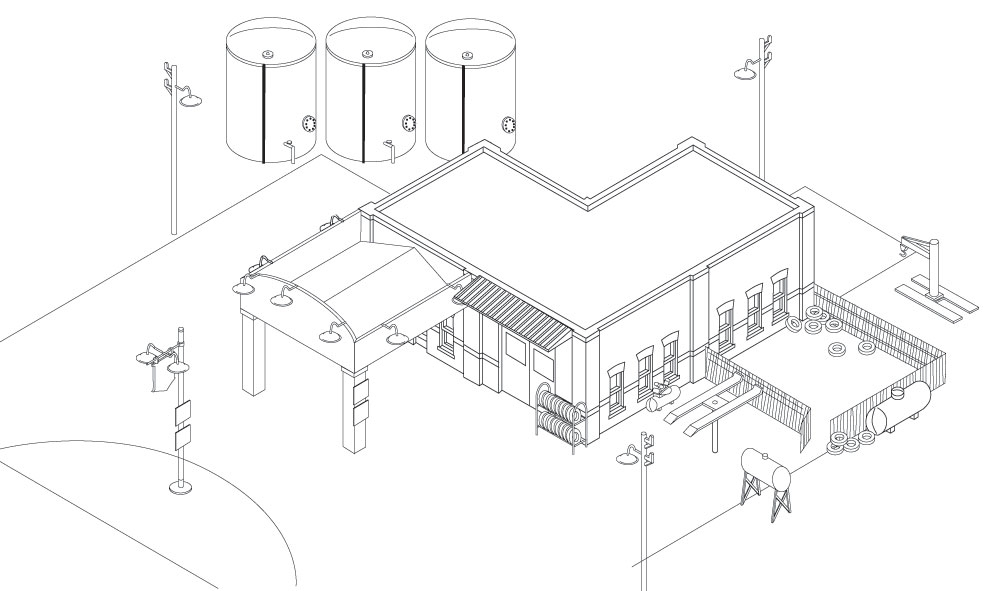
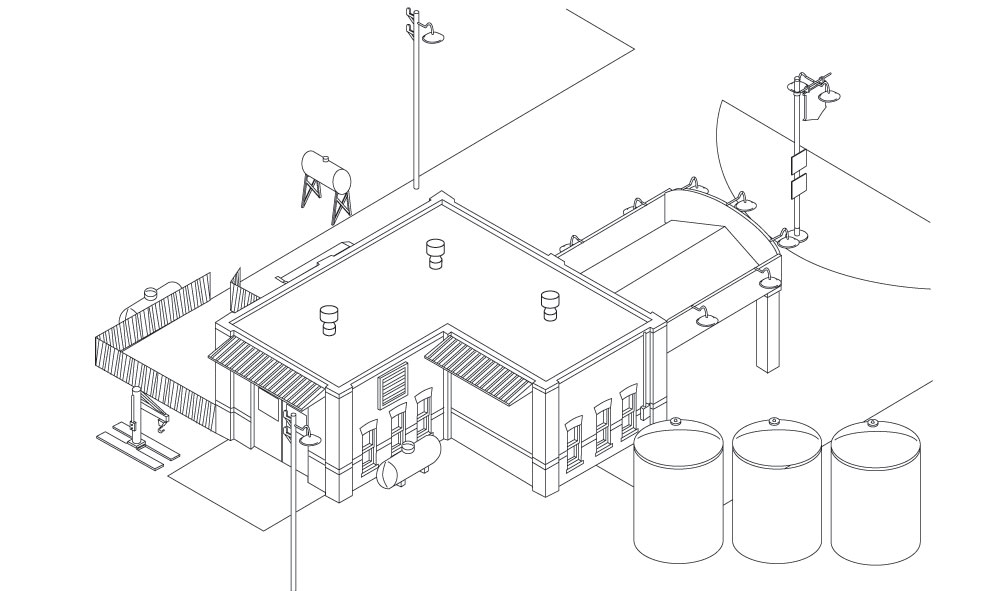
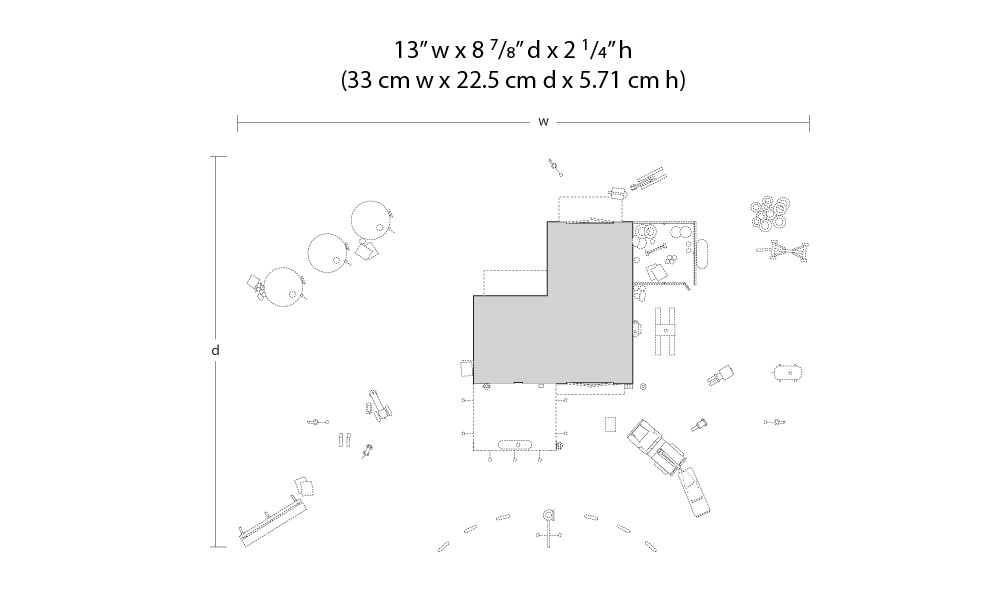
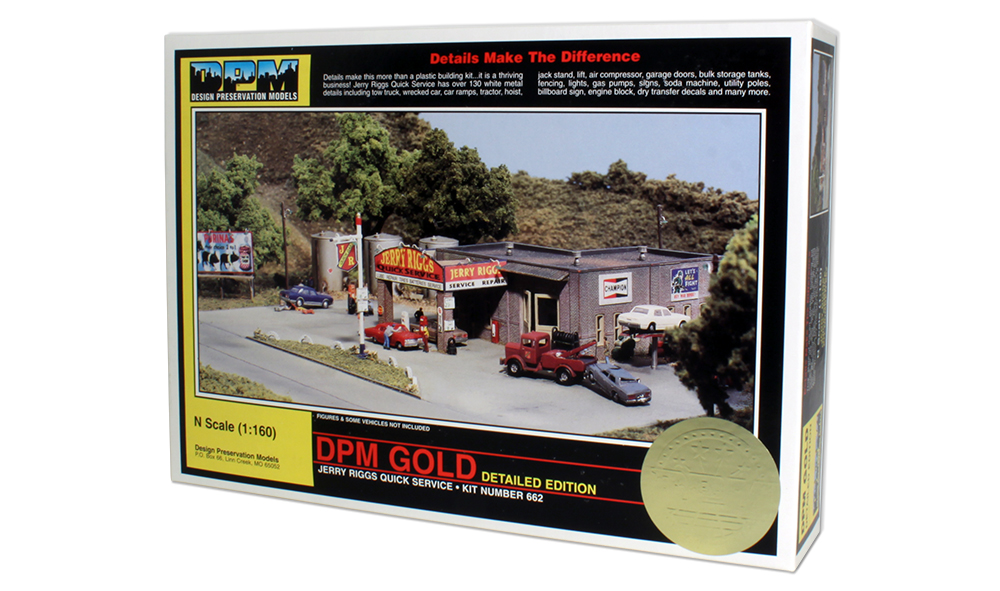
Full-service is alive and well on your layout! Vintage service station includes more than 130 details, including a tow truck, wrecked car, billboard, tire rack and tires, sign lights, gas station sign, fork lift, compressor, small kerosene tank, dry transfer decals and more! See photos for footprint.
Vehicles, figures and landscape not included. Click Contents to view list of included materials.
Colors may vary from actual product.
-
Kit includes:
- 1 Street Level Freight Door Wall
- 1 Street Level Blank Wall
- 2 Street Level Window Wall
- 1 Street/Dock Entry Door Wall
- 2 Entry Doors with Windows
- 4 Windows
- 5 Street Level Pilasters
- 2 Roof supports - 0.08 sticks 4 1/2" (11.4 cm) length
- 1 Inside corner strip - 0.06 stick 5" (12.7 cm )length 2" (5.08 cm)
- 2" Wire 0.02
- 1 Roof material - 5" x 6 1/2" (12.7 cm x 16.5 cm)
- 2 Clear window material - 2" x 3" (5.08 cm x 7.62 cm)
- 1 Black paper - 7 3/4" x 4 1/2" (19.7 cm x 11.4 cm)
- 1 Decal sheet
- 1 Poster sheet
- 3 Awnings
- 1 Louver Vent
- 3 Roof Vents
- 1 Power Mast
- 2 Stacked Car Tires
- 3 Fence Pieces
- 2 Propane Tank
- 1 Solo Gas Pump
- 1 Two Pump Island
- 1 Floor Jack
- 2 Car Ramps
- 2 Stacked Tractors Tires
- 3 Tractor Tires
- 6 Tractor Tires with Rims
- 10 Tractor Tire Halves
- 1 Tire Changer
- 2 Engine Blocks
- 1 Axle
- 1 Wrecked Car
- 1 Old Hay Wagon Frame
- 1 Junk Pile
- 1 Dolly with Barrel
- 4 55 Gal. Barrels Stacked
- 8 Pallets
- 2 Wood Crates
- Instructions
-
How To Build, Paint & Detail DPM® Kits
Learn how to build DPM Building Kits from start to finish with loads of tips and techniques!
-
Made in the USA
 Woodland is committed to a business practice, which supports the economy of our local community.
We manufacture the vast majority of our products at our Linn Creek, Missouri manufacturing plant, which also houses our product development, package and creative design, marketing, sales and customer service operations.
Many of the products or parts of the products we manufacture overseas, come back home for packaging and shipping by Woodland employees.
When you purchase Woodland Quality Brands, you support American manufacturing working in balance with a global economy to support American jobs.Safety Warning
-Model making product. Not a toy! Not suitable for children under 14 years!
-Produit pour le modélisme. Pas un jouet! Pas adapté aux enfants de moins de 14 ans!
-Producto para modelismo. No es un juguete! No adecuado para niños menores de 14 años!
-Modellbauartikel. Kein Spielzeug! Nicht geeigent für Kinder unter 14!
*
CAUTION: Cutting tool recommended. Use with care.
MISE EN GARDE : Outil de coupe recommandé. Utilisation avec soin.
PRECAUCIÓN: Herramienta cortante recomendada. Uso con cuidado.
VORSICHT: Schneidwerkzeug empfohlen. Gebrauch sorgfältig.
-
-
The back wall of some DPM kits is too wide, what should I do to correct this?
The back walls appear wider due to draft angles. Draft angles are necessary for removing the walls from the mold. Following the kit instructions, sand beveled edges (draft angles) on walls until flat and fit squarely together.
-
How do I glue together metal castings?
Always begin by washing the metal castings in warm, soapy water. Rinse well and let dry. This will remove any remaining mold release agent and allow the glue and paint to adhere better.
Glue Metal Castings with fast-setting epoxy or cyanoacrylate adhesive (super glue).
When using super glue, a good bond depends on surface contact. Super glue is not filler-type glue. Use sparingly, too much glue will make a poor bond. Apply a tiny drop onto one of the parts being glued, then hold parts together for about 10 seconds. For larger Castings, hold parts together and apply a small drop of glue where parts meet. Capillary action allows the glue to seep into the contact area, creating a strong bond.
Allow glue to dry completely before moving to the next construction step.
If the metal castings were painted prior to assembly, be sure to scrape paint off glue points.
-
The back wall of some DPM kits is too wide, what should I do to correct this?